Assembly of a 2.5" HDD in the S360 box V3
Instructions on assembling and installing a 2.5" HDD into your Secury360 system, focusing on correct placement and connection for optimal performance.
Follow these steps to install a 2.5” HDD in your S360 Box V3:
1. Remove the cover
- Detach the cover to access the inside of the S360 Box V3.

2. Prepare the 2.5” HDD

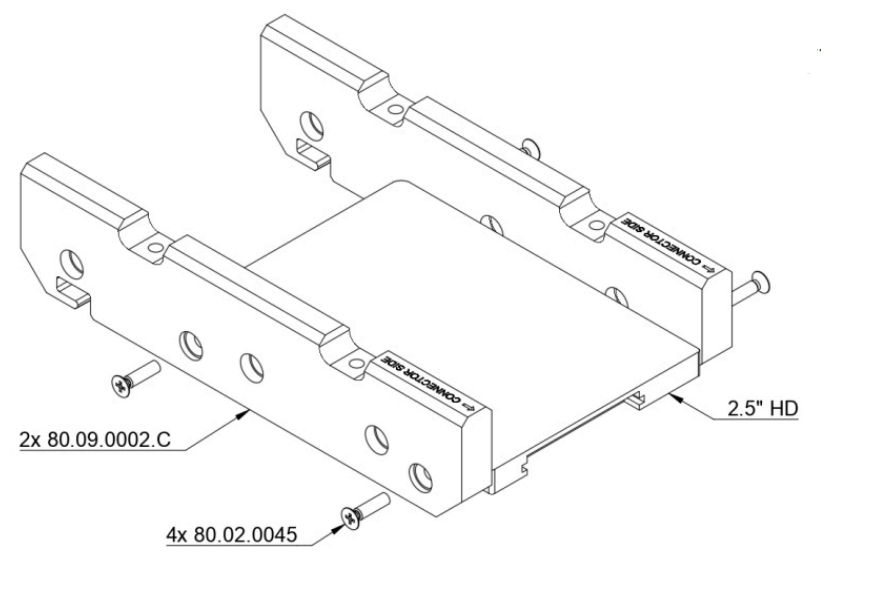
- Attach the brackets (2x 80.09.0002.C) to the 2.5” HDD using the screws (4x 80.02.0045).
- Ensure the connector side of the HDD faces outward and aligns with the labels on the brackets.
- Do not fully tighten the screws yet.

- Place the brackets on a flat surface and tighten the screws in a crossed sequence to ensure the HDD’s bottom surface is flat.

3. Mount the 2.5” HDD

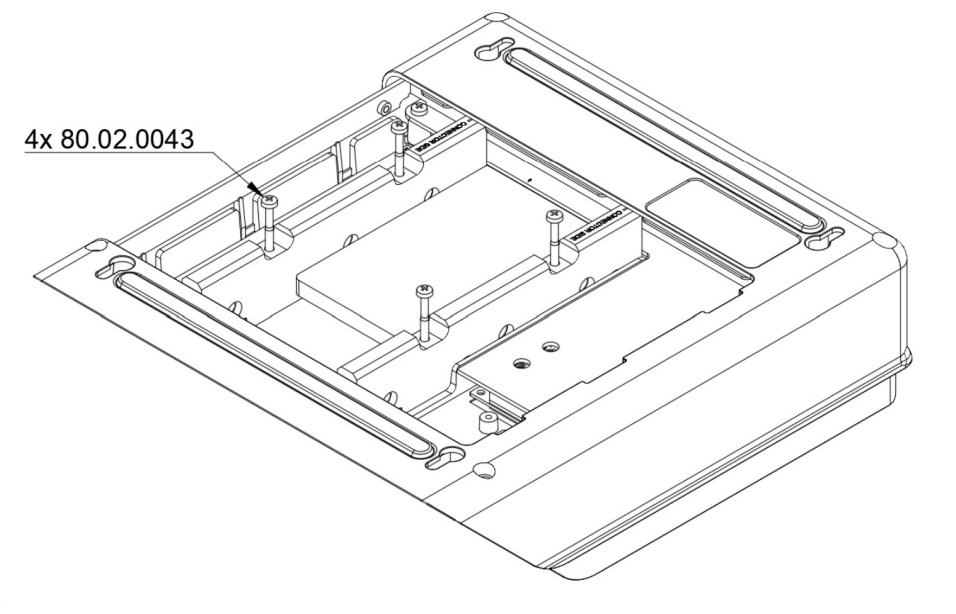
- Tilt the prepared HDD assembly and insert the brackets into the slots labeled “HD25” inside the S360 Box V3.
- Align the HDD connector with the connector on the PCB.

- Lower the HDD assembly until the HD guide fits into the groove on the side of the bracket.

- Slide the HDD forward until it clicks securely into the PCB connector.

- Secure the HDD assembly with 4x 80.02.0043 screws.

4. Reattach the cover
- Replace the cover to close the S360 Box V3.
